Brows | April 07, 2020

Drawing on your brows every day takes 10 minutes that you’d probably rather spend doing something else. You’ve no doubt heard of microblading, the semi-permanent solution to sparse brows that creates the illusion of hairs on your skin. But have you heard of powder brows? Powder brows, also known as ombre brows or ombre powder brows, is a slightly newer semi-permanent brow technique that creates a soft, powdered look that subtly fills in your brow.
Powder brows is great for people who already have full brows but just want a little extra definition without the hassle of filling in the brows every day. It’s also the preferred technique for people with oily skin, as it typically lasts much longer than microblading.
We spoke to our go-to brows experts, BROWZ, aka Dubai’s hottest semi-permanent Makeup, Brow, and Lash salon to get the full scoop on powder brows. Naturally, we had to try it out to give you the full scoop, and we were lucky enough to have the extremely talented permanent makeup artist, Chloe Walsh, take us through the process. From how long powder brows last, who they work for, and the step-by-step technique and healing process, here’s everything you need to know about powder brows, and how they compare to microblading.
The Difference Between Microblading and Powder Brows
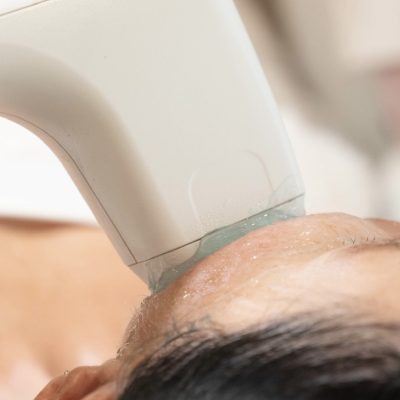
“Microblading uses a handheld tool to create natural hair strokes throughout the brows to fill in any gaps you may have,” which Chloe tells us creates a ‘fluffy’ brow look. Alternatively, “Powder brows uses a digital machine, which allows soft pixels of color to be layered onto the brows to create the perfect shape, which results in more of a ‘velvet’ soft eyebrow powder look.”
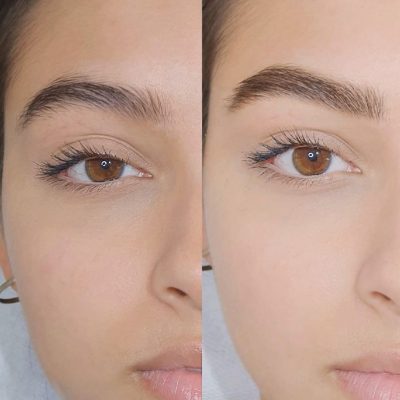
Ombre Powder Brows Before and After:
How long do powder brows last?
Chloe tells us powder brows typically last for 12 to 18 months, and that they’re great for people who have oily skin because the pigment lasts longer, whereas the microblading technique might fade more quickly. She also reminds us that all of this is dependent on your lifestyle and skin and that as well as this working well for oily skin types, it’s also a great option for “mature clients and those who play sports and love to be active.”
Who would you recommend powder brows to?
“Honestly, anyone and everyone! I love the powder brow result, I actually have this technique myself because I like the softly powdered result on my brows.”
Can you combine microblading and powder brows?
According to Chloe, it’s a really popular technique; “This is classed as a “hybrid” brow or “combination” brow where you combine both microblading and powder brow techniques. The results look beautiful when hair strokes are at the front of the brow and the powder blush is going through the rest of the brows.”
If you have full brows with some sparse patches, you can have hair-like strokes added to these areas using the microblading technique, for a more natural, 3D finish.
Powder Brows: The Process
First things first, apply numbing cream. Then discuss with your brow artist the type of look you want to achieve and your brow goals.
Step 1. Brow mapping: Chloe tells us that she prefers to draw freehand and use the natural brow as her guide, but for powder brows, she starts by mapping out the brows with a piece of thread and measuring calipers. Chloe explains, “I find the centerline of the forehead, in the middle of the brows, then find the line of the height of the brows to make sure they are the same height top and bottom. I will then find the tail of the brow in line with the corner of the eye, and the highest point of the brow, then I copy the exact measurements on the other side of the brow and draw in the shape using these measurements. This technique achieves as much symmetry in the brows as possible.”
Step 2. Refining the brow: Once the mapping is done, Chloe works with us to make any changes that we want to make to balance the brows and to fit our own personal style. Next, Chloe tweezes the brows where necessary to fit the shape, then shaves away fine hairs above and below the brow (waxing would sensitize the skin too much), so she has a blank canvas to work on.
Step 3. Choosing the color: Chloe works with us to choose a color c there are lots of options – and we decide on a soft brunette shade, which she assures us will complement our skin tone and hair color.
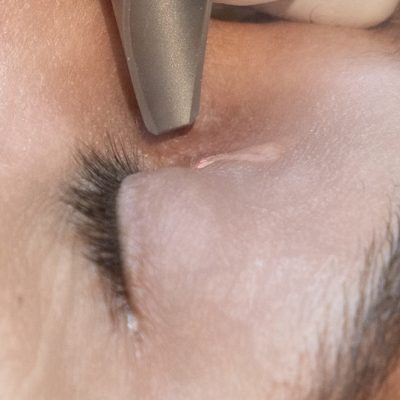
Step 4: Filling in the brows: With the shape defined, Chloe starts to fill in the brows using the machine, which scratches pigment into the upper layers of the skin. To get the ombre brow look – where the front of the brow is lighter than the rest of the brow – Chloe distributes tiny pixels of color more sparsely at the front of the brow, which makes it look a little lighter and gives a more natural finish. Chloe repeats this process a few times to build up the color, layering pigment on top in between each layer.
Step 5. Hair strokes: Once the color is laid down, Chloe uses a microblading blade to create hair-like strokes at the front of the brow.
We found the entire process to be completely pain-free, literally, we could barely even feel a scratch.
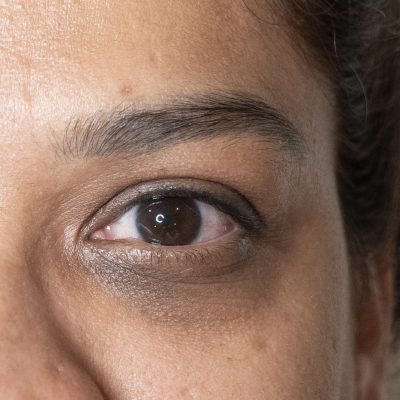
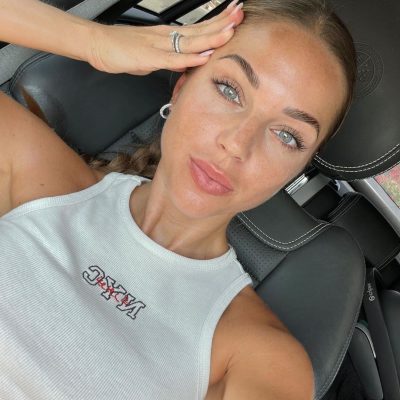
Here’s what our brows looked like with no makeup, and four weeks after our first powder brows session:
Powder Brows Healing Process and Aftercare
After the first session, you might be a bit surprised as the brows will look thicker and darker than the final result will be. The color you can see immediately after your appointment will become around 50% lighter over the next four weeks.
For the first 48-hours, Chloe advises us to avoid getting our brows wet, then after 48 hours, we’re advised to keep the brows moist with an ointment – we’re given the Elizabeth Arden Eight Hour Cream Skin Protectant, $24. Chloe also says to steer clear of the sun, swimming pools, and avoid exercising for at least three to five days after the session.
After around three to four days, our brows start to scab and flake. Whatever you do, don’t pick your brows and allow the scabs to fall off naturally. It’s not cute, but it’s not that noticeable either.
The scabbing process is pretty much over about one week post-appointment, and at this point, the brows look lighter than the final result will be. For the next couple of weeks, it may seem like the pigment has disappeared, but this is just the skin healing.
After around four weeks, the pigment starts to become more visible again and you’ll notice that the brows appear more defined.
After four to six weeks, if you’re happy with the look, you don’t need to do a top-up. Chloe says, “I recommend to only get a retouch if really needed for powder brows, because you get an amazing result after one session. If you add more pigment, the brows will begin to look like you have actual makeup on, rather than a natural soft haze of color.”
We found that our brows looked amazing after just one session, and they looked really natural with no makeup. For example, Chloe told us, “I only ever have one session myself and I love this result, but of course if you feel you need a little retouch we will advise to do it after four weeks and just to do a small retouch where needed.”
If you typically prefer a fuller brow, then you may want to intensify the brows with powder when you do your makeup, in which case, you might find you would prefer to have a top-up after four to six weeks so that you won’t need to add makeup yourself.
Powder Brows Vs. Microblading
Powder brows tend to last a little longer on the skin, which is why they’re recommended for people with oily skin, as microblading can last as little as six to 10 months for some people, depending on their skin. While microblading no doubt gives a more natural look, we have found that some hair-like strokes actually start to fade and become less defined after around four to six months on some people, which ultimately gives more of a powder brow finish anyway, as the hairs are no longer defined.
If you already have full brows but are tired of filling them in yourself, we definitely recommend powder brows, which give a gorgeous natural finish that simply helps to define your brow. The other benefit is, even if you add makeup to them on occasion to make them darker, you have the shape already there to draw on top of, which makes the process of doing your brows so much faster and easier.
If you want to find out more about the process, hit up Chloe or Browz on Instagram. P.S. Chloe will be in the UK shortly (she’ll be based in West Yorkshire and London), and she’ll also travel back to Dubai for appointments regularly! What do you guys think of ombre powder brows, would you try them?
For more brow tips, please visit!


